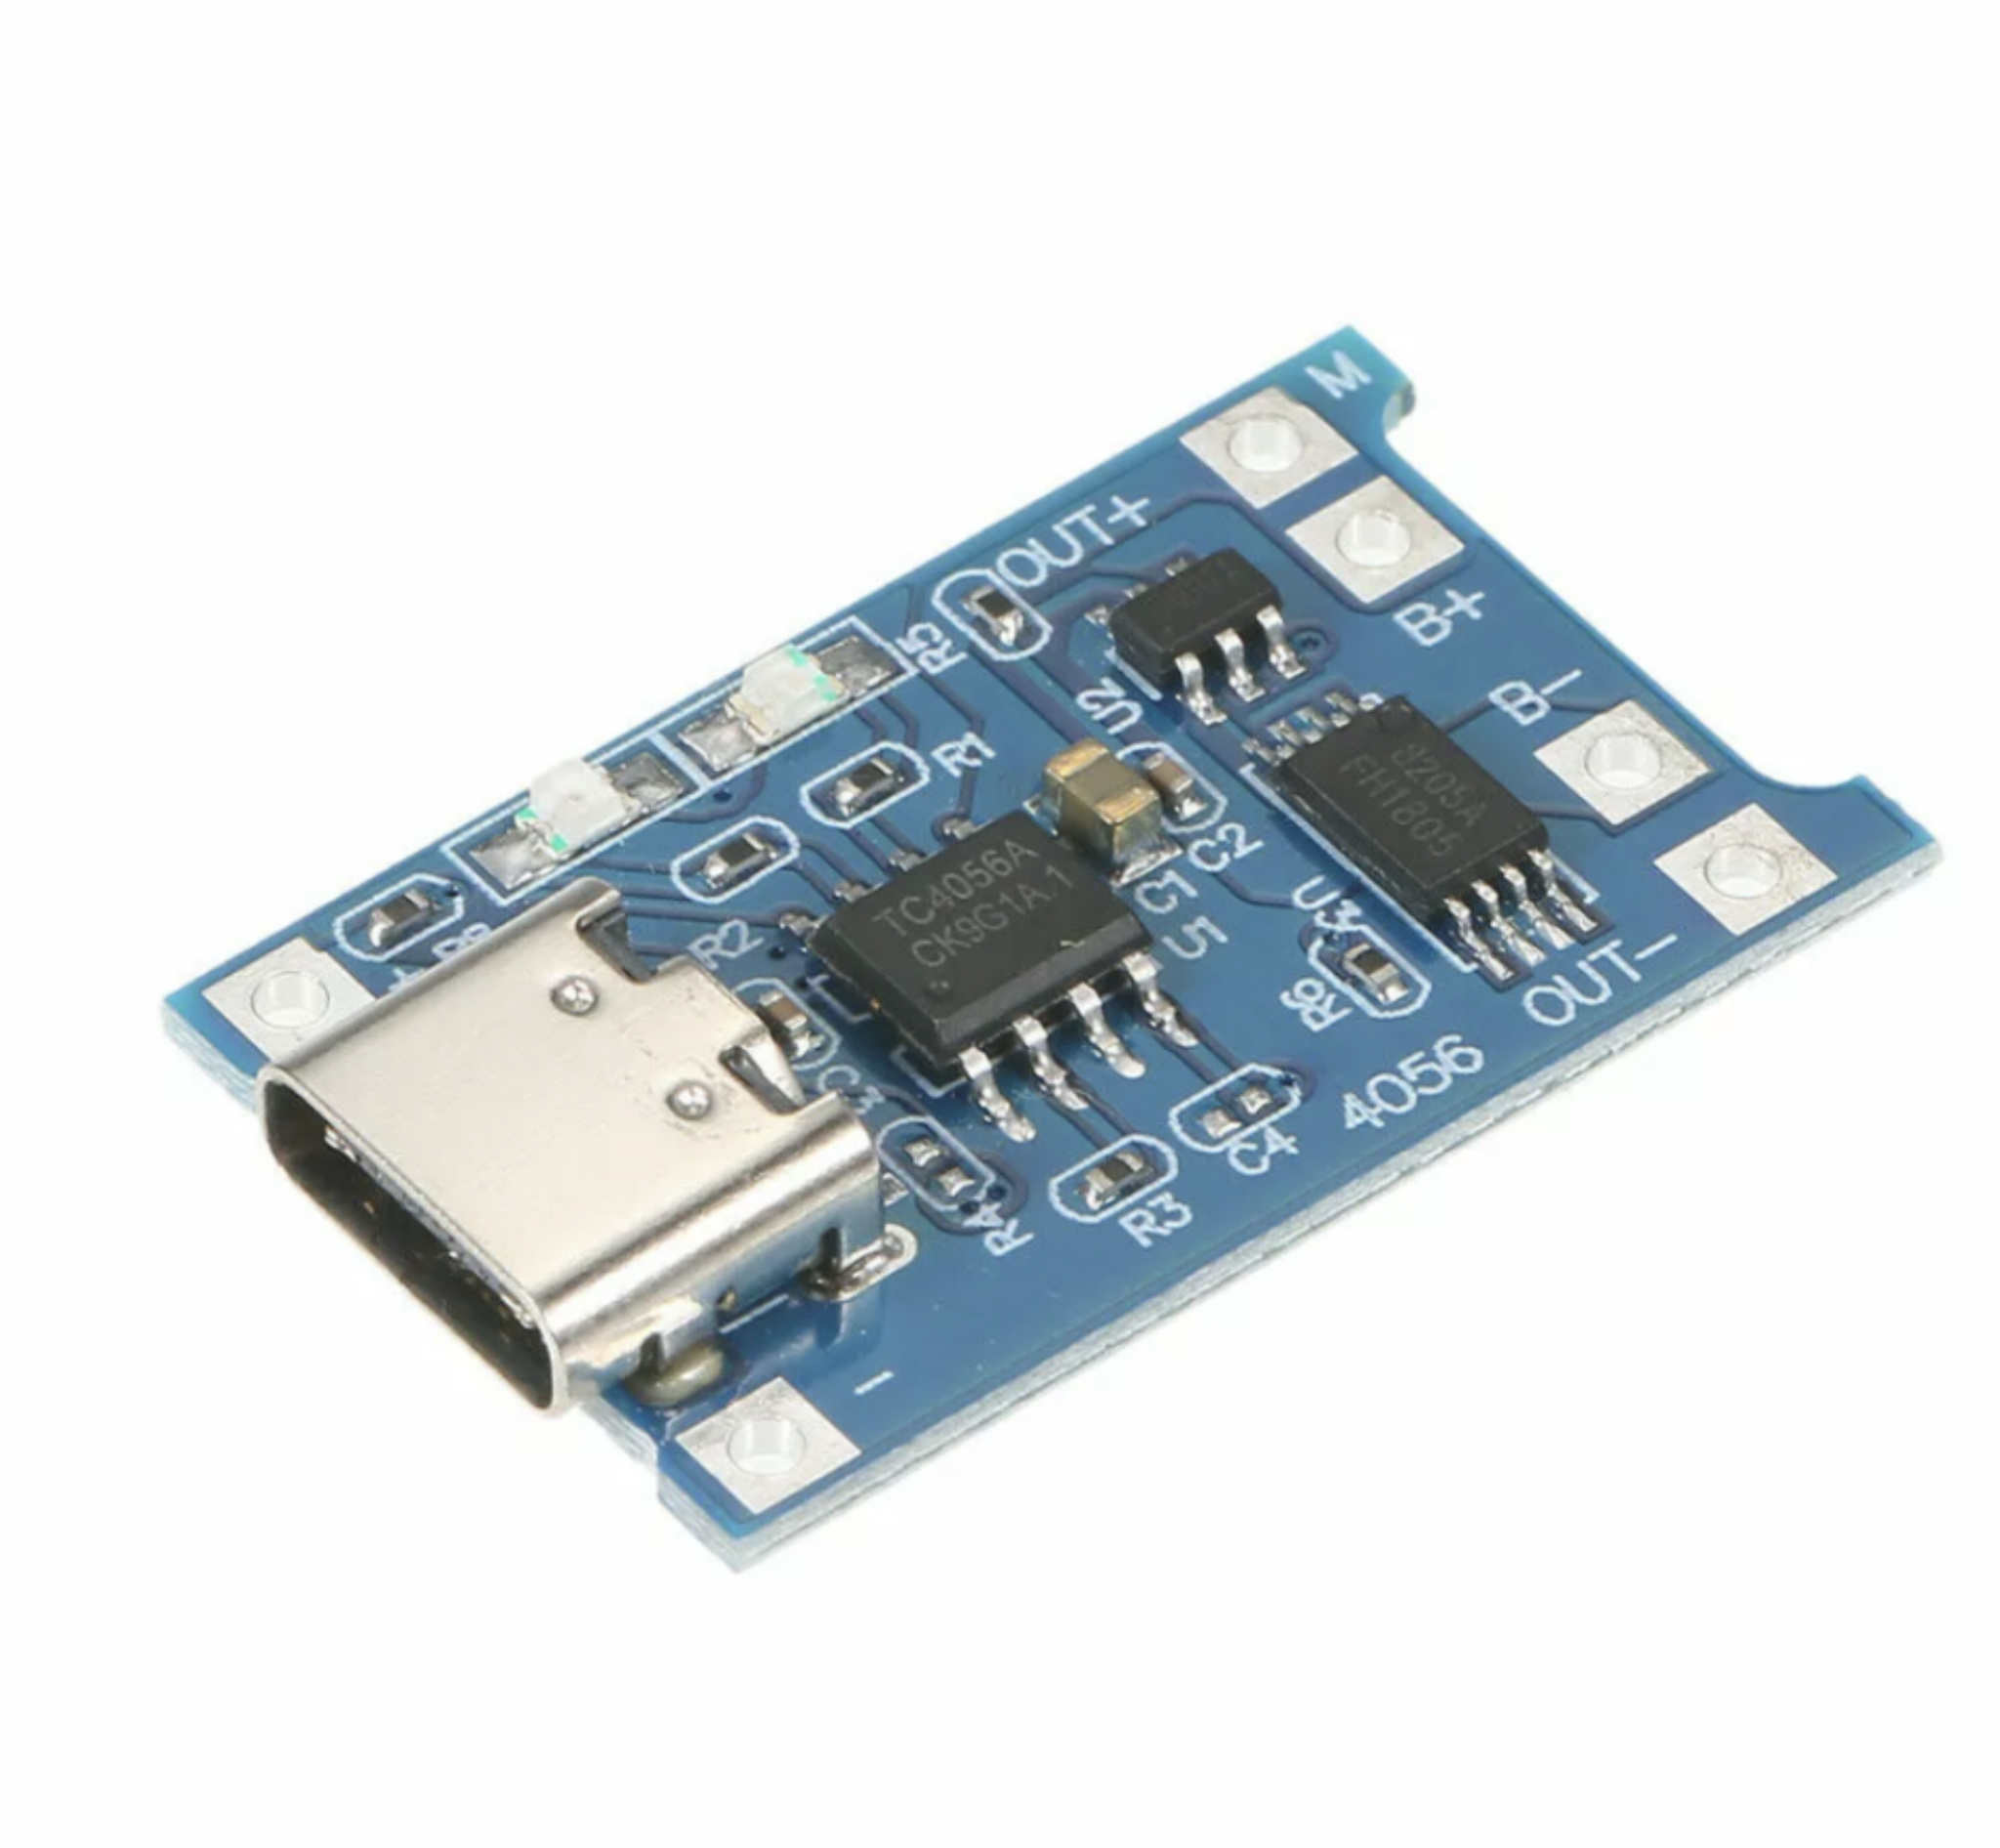
Hey there, hoping someone can help me with an electronics question. I’m planning to laser cut a plywood enclosure to house a small battery and charging board to power 6 small LEDs. The board that I got is this one:
I initially thought I could use some small screws to secure the board to the plywood, but based on the picture the holes don’t look like they’re meant for screws. Can someone help me figure out how to secure this board? I’m hoping to be able to make it pretty solid as I’d like to have the charging port usable as it sticks out of the plywood enclosure. Any advice would be greatly appreciated!
The little info on the site says the line of four holes is for connecting battery and power out, but no word about the two holes near the USB plug. Any possibility of using those two holes to screw it down?
It would be really weird to put a jack like that on a board with no way to physically secure it, but it looks like those holes might be unregulated 5V inputs.
If it were my project, I’d have no qualms about putting some (small!) screws in those holes so long as the thing you’re screwing to isn’t conductive. Perhaps some mounting tape on the bottom of the board too to keep it from flexing.
The possibly more-correct way to do it might be to make a carrier board with the appropriate mounting provisions and header pins to solder all the holes on your power board. Solder the power board to the six pins on the carrier.
You’ve got some empty space around the “4056”, “OUT+”, and “-” silk screens. Why not put screws right on the outside of the board and use the side of a washer to clamp the board down? You can put some Kapton polymide tape on the board just to be sure the washer can’t short out nearby pins if the board shifts around.
Thanks everyone! Some very interesting options. The boards arrived yesterday, and first thing I’ve noticed is that the USB C plug is very tight, so it’s very clear how important it is to secure the board well.
I think I’m gonna try to do a bit of everything and see what works best. @Jon if you have any recommendations for where I could find a carrier board that would be awesome. I did a little googling and wasn’t quite sure I was finding the right thing.
Those holes on either side of the USB C port are just a different way to give the board input power. This type of board is really meant to be stuck somewhere with double-sided tape or soldered into place. Be VERY careful if you do choose to drill and screw through the board, as it seems to use the top and bottom space as a common space for the negative. There’s a really high chance of shorting something if you go down that route. If you haven’t already tried, your best bet is probably with a 3d printed case that snaps together and tightly holds the board in place with proper screw holes on the sides.
No ideas of where you’d find a ready-made carrier board if the supplier you purchased from didn’t offer one.
It’d be a pretty simple board to make by hand. Just lay out pins to match each hole on your charger board with nice big pads to solder them to with no other metal on the board.
I agree with @Zindswini that you definitely don’t want to drill any new holes in your charging board
Thanks Bailey, yeah, these boards were pretty cheap but I’m still gonna stay away from drilling in to anything, it’s all so small it can only end in disaster.
I like your idea of a 3D printed case. I’m already pushing my electronics and laser cutting skills way beyond their limit on this project, so I’m not sure I’m ready to throw my almost non-existent 3D printing skills into the ring, but it’s definitely an interesting option!
ah, yeah Jon, I figured there wouldn’t be any ready made carrier board available, but even when I was looking up how to make my own I was getting a little bit lost. Is there a website you would recommend sourcing boards and/or parts for constructing my own?
I’m not sure if you have access to the printers, but if you give me a couple of measurements I wouldn’t mind throwing something together in Fusion for you!
Heh. I did some Googling and am having a hard time finding an instructable this simple
If you search for instructions to make your own board, you’ll find a lot of steps for doing your circuit layout in CAD and iron-on resist transfers or photoresist paint. You don’t actually need to do any of that – just mark the holes for your pins, use the really old-school method of just blobbing some plain resist around each hole with a paintbrush or felt-tip pen, then etch the board with ferric chloride.
It’s been so long since I’ve actually done this that I got all my materials from Radio Shack, so I’m sure there’s somebody else around that can give you better advice.
If you don’t want to mess with chemical etching, this board would be simple enough you could probably just make your solder islands with a dremel. You could use a small burr to make a moat around each solder pin so they’re not shorted together – it’s not necessary to remove all the extra plating from the board.
Before you start tinkering, measure the distances between the holes in your board. If they all line up to a regular grid, you could use a prototype perf board like this, no etching required
They wouldn’t be quite as strong as a solid board, but i’m sure it’d be good enough and it’d be a lot easier. Depending on how pretty you need the result to be, it might even be good enough to start with a perf board and add extra holes for any pins that don’t line up with the grid. You might need some massive solder balls, but if it’s inside a box
Ah, @Zindswini, that would be awesome! I’ll send you a DM to talk about details.
And thanks for the advice @Jon, I should have known Amazon would have something. As an eBay employee I am duty bound to look for the same or similar product on eBay, so we’ll see how that goes, but that may be what got me in to this mess to begin with… Anyways, lots of interesting stuff to test out there. Looks like I’m gonna be learning an awful lot on this project.